- Error
DIY Owl Pillow Step-By-Step
Gettin' Crafty
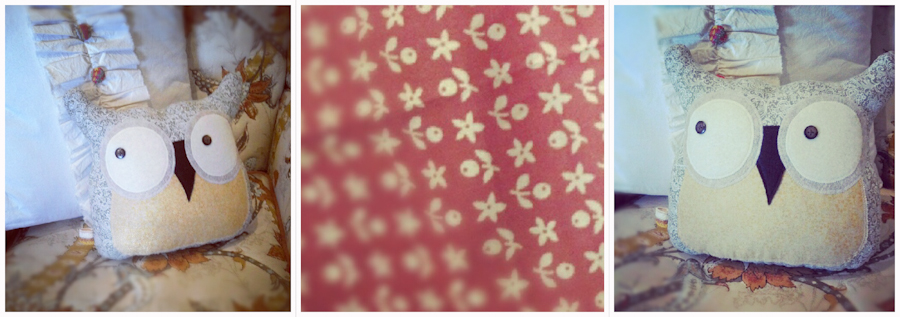
I somehow managed to find myself doing some kind of craft every week (this is not necessarily a good thing) . I honestly put the blame on Pinterest that my dishes don't always make it to thier rightful place in the cupboards. Instead, they simply stay in the dishwasher till I need them again. This last week I was busy sewing a owl pillow for a good friend. She had come over to my house for a visit and fell in love with one of the owl pillows I made last summer. I really did not know what I was getting myself into when I agreed to make her one. I am no seamstress and don't put a whole lot effort into how straight my seams are. No one really notices and my pillows pretty much end up getting sat on, tossed to the floor, or often I re-sew it because I found a special vintage fabric at the Goodwill. I'm more of a ........this looks like it's even, pin it together, sew it with confidance and hope that it all works itself out somewhere between the stuffing and final iron job :P BUT, sewing for someone else is whole 'nother thing....... So I bit the nail and attempted to make my friend's owl pillow properly and make sure everything was in proportion and well measured out. Since this is rare I pull out my phone camera and document this new craft adventure!!
- Body and Belly are made from your choice of fabric
- Eyes and nose are made from felt of your choice of color and your favorite type of button.
- Stuffing or foam
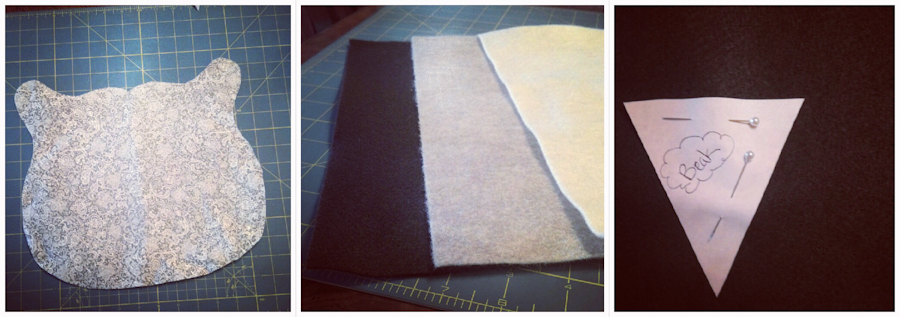
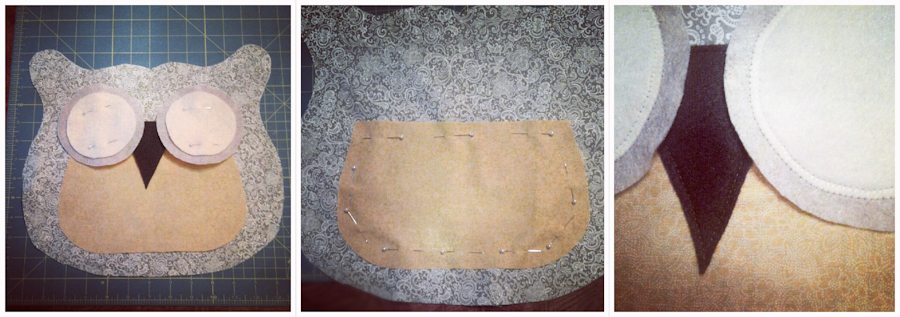
Design your owls body that you would like him to have. Make sure you include your 1/2 inch seem. Design his beak. and cut both out.
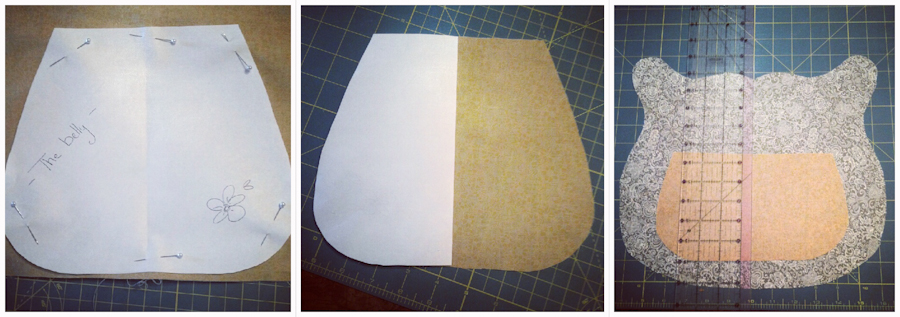
Design his belly. I had made it to long and trimmed it off the top to fit his body better.
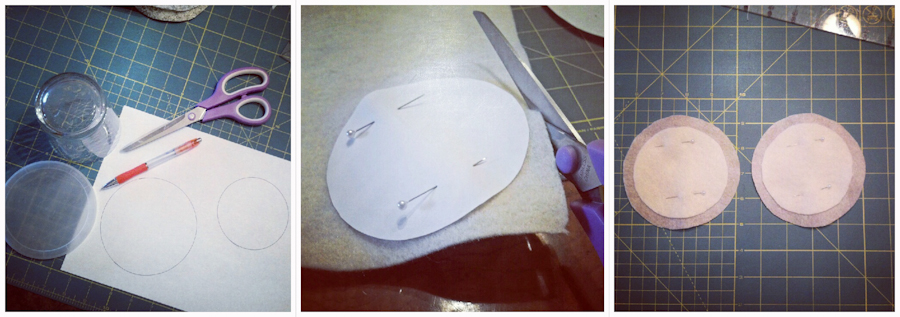
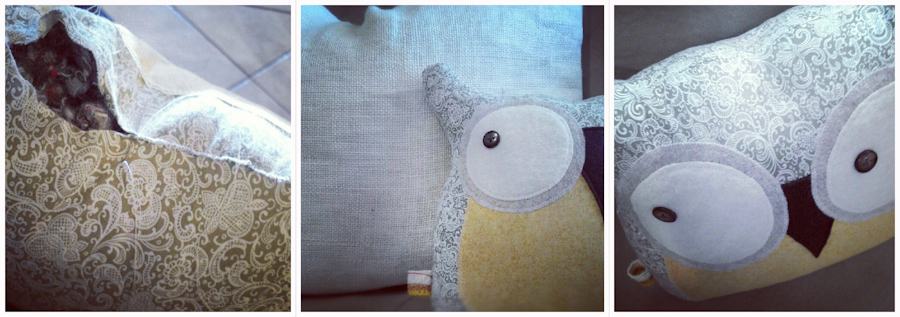
For the eyes I used items around the house to get the perfect circle
Put it all together and play with it till you get a feel to how you would like his face to look. I like to zigzag over the felt for a more finished look but it's up to you.
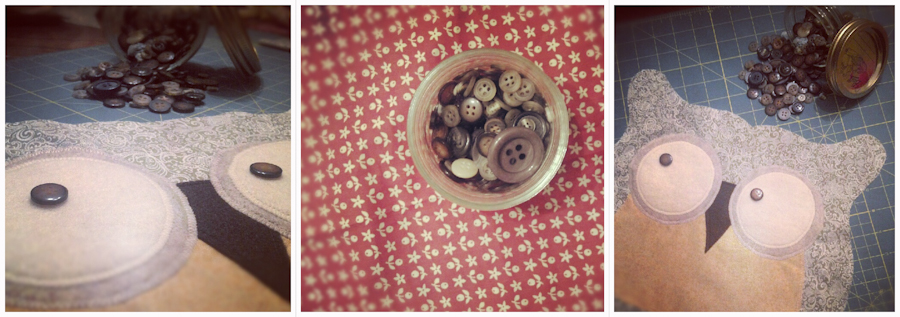
Button love for the eyes. Play around till you get the expression you would like him to have.
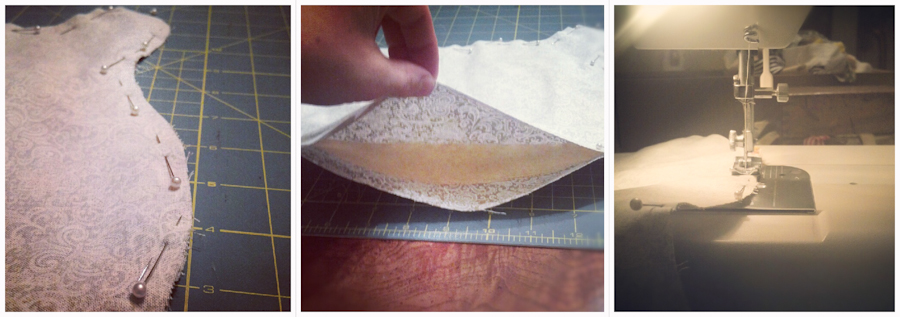
Now that his face and belly is sewn. Turn him wrong side out pin together, take a deep breath and go for it!!
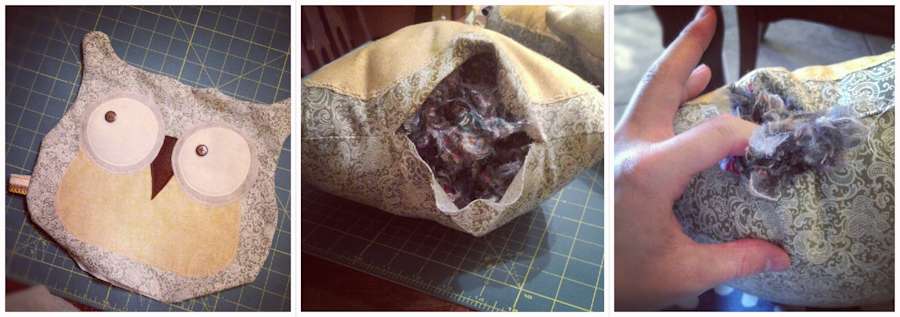
You really won't know what he will look like till you start stuffing him. I think stuffing is the hardest and what takes the longest to do. You have to stuff till you can't stuff any more. You really have to work at it till he starts to take form. Don't give up right away. Keep working it and it comes together!
Hand stitch the bottom together and you are done! A cute addition to your home! Happy Sewing!!